Saturday, January 11, 2020

I forgot.*

*Disclaimer: not to be used in conversations with the IRS.

Press record, now.... or not.


I got so excited to work in the shop, I forgot to take pictures.  

Finished the slope on the jaws, then moved to the step on top.  That was a 3/8 4 flute end-mill, .100 first pass, then .088 on the second.

Next up was my first use of a mill drill.  It's a 90 degree point end mill. .500 in diameter.  Watch Mr. Pete use it.  It's a fragile tool, so I followed his lead.

Ebay capture, .500 mill drill.  20 samolians.


It worked a treat.  

I need to get some more Acme holes ordered.


I'll do better.  Honest.  Boy it was fun in the shop today.

Friday, January 10, 2020

Shop Time!

Finally!

Storm coming in, so I had to stop the fun time early.  Before I got run out, I got the ends squared and started on the sloped ends of the jaws.  Oh man, it feels good to stand there, and crank handles and listen to the mill, and smell the cutting oil, and just..... yeah.  Oh baby, life is good.

I placed an angle block marked 20 degrees, and I used Mr. Meyer's most excellently constructed machinist clamp to hold it on the fixed vise jaw.  Mr. Meyer, thank you for your commitment to excellence.  It really shows in your tools.

To those gone before, I salute you!
5/16" was the mark on the drawing for the 20 degree slope to leave on the jaw.  The line was laid off with a tool bit that was just there, seemingly waiting for me to use it!

Ready when you are, bud.

I got started on the cuts, and it quickly feel into a rhythm.  Something I've missed for far too long.


Two things I noticed.  First, the stock must've slipped a bit, as the 5/16" mark was below the fixed jaw, so I couldn't finish the cut.  Not sure if I pushed it down due to wimpy vise-ing, or if it slipped when I placed it and didn't catch it.  Second, the bit is hanging out a bit too far.  I'll fix that next session.  It might be a bit loose as well.


Due to the vise interference, I measured the last X axis cut, and found it was about .580 to the fixed jaw, so I took a .550 and then an .020 to finish it as close as I wanted to get to the hardened jaw.  I'll file that off soon enough.

Re-sharp .750 end-mill and 600 rpm.  It was sweet music.  Till the lights flickered and the wind picked up.

Heavy weather inbound, left to right  (WX)


More later.  For sure!

Thursday, January 9, 2020

Wrong wheel hubs.....


It's a comedy of errors....  New ones due on Saturday.


My fault actually.  I trusted what I read to be accurate: "Yes this will fit your ...."  And, no, actually, it won't.

Rolling Your Own

You too can make your own tools....

Making a seal driver is pretty straight forward.  Dig up a piece of stock big enough to find the final part in, layout, machine and done.

Simple, yeah?  Not so fast.

Measure the National 706106 seal, and figure out the driver size I need.  I could order one of these: 


Not cheap enough.


I found some square stock, and cut it down a bit in the little 4x6 horzontal saw...... That got rusty sometime last year!!!  What the heck!  Anyway..  I dropped in a half inch Acme hole (W E Coyote approved vendor), and got it marked up for the lathe.

It's a rectangle... no worries.

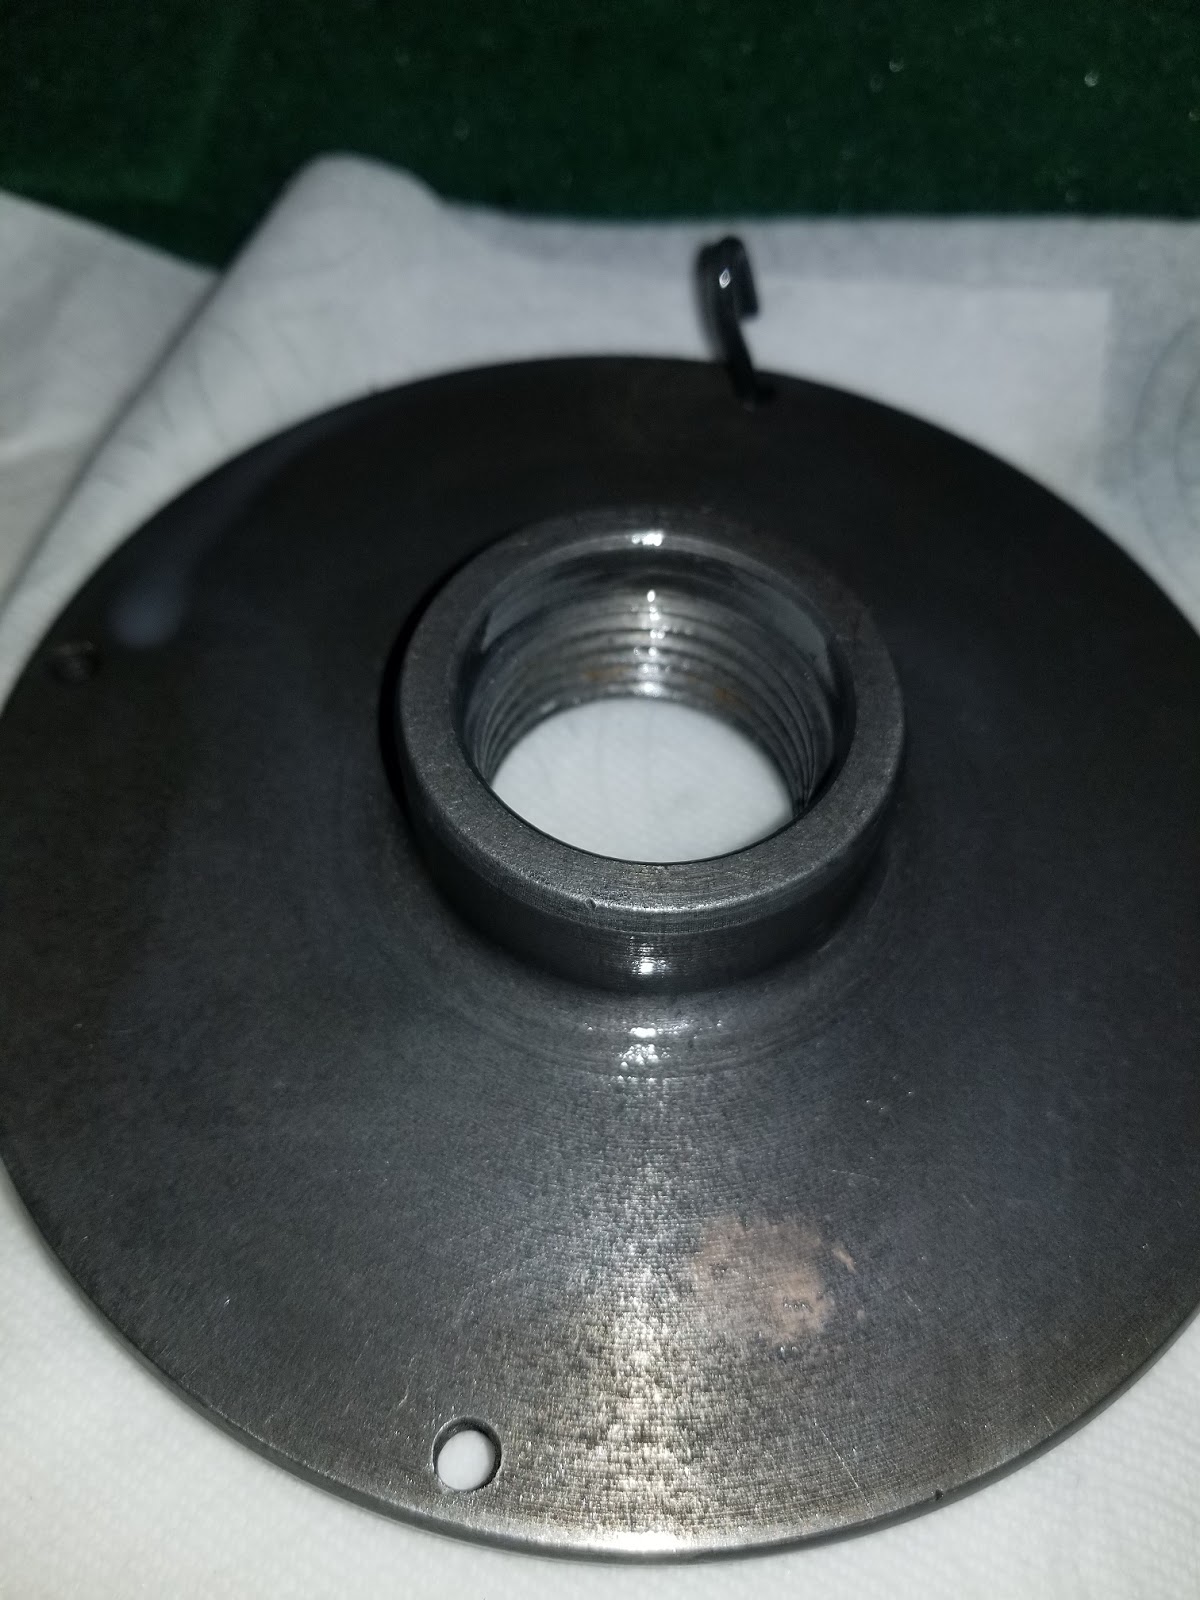
Chucked up in the 4 jaw as the 3 jaw has a badly cracked threaded collar for the spindle.  I'm not sure I'd like to catch that if it fails and goes for a trip.  Lots of measuring and tightening, and it's time to bore out the hole to .625" for the slide hammer.
I really don't remember why I needed the pick...


I moved in .300 or so and made it round, then reversed it and made the step and pushed off the flange.  Safety department said I should use the center to support it, and I did.
It amazes me how much swarf hides a part.

Ran out to the truck and drove home the seals.  I'm borrowing the neighbors carport and slab to do this, and it's been one delay after another.  I should be done Thursday.  Tool manufacturing took about 3 hours all told.  I'm not fast.  Lotsa interruptions...


Hey, would you be interested in a tour of this??

My 3 phase power plant.


Well, I got in the house, and my wife was stove up, and was ready for supper.  We had some instant ravioli, but it was nekked.  It needed some sauce.  This stuff tasted great.  Just a quick recipe from a 'net search.   I washed my hands twice, but it may have tasted a bit like WD-40.  I liked it. So did the missus.  (be sure to use enough italian seasoning and garlic, to hide the leftover shop flavors.)


Ingredients

  • 1 pound ground beef (or 1/2 lb ground Italian sausage and 1/2 lb ground beef)
  • salt and freshly ground black pepper , to taste
  • 1 medium onion , chopped
  • 15 ounces tomato sauce
  • 6 ounces tomato paste
  • 1/2 teaspoon Italian seasoning
  • 1 Tablespoon dried parsley flakes
  • 1 teaspoon garlic powder
  • crushed red pepper flakes , to taste
  • 1 Tablespoon Worcestershire sauce
  • 1 Tablespoon granulated sugar
  • 1 cup water
  • 1/4 cup fresh basil leaves (optional)
  • spaghetti noodles , for serving

Instructions

  • Season ground beef with salt and pepper. 
  • In a large skillet, add the beef and chopped onion and brown.  Drain excess grease. 
  • Add tomato sauce, tomato paste, Italian seasoning, parsley, garlic powder, crushed red pepper, worcestershire, and sugar to the skillet. 
  • Stir well to combine and bring to a boil. Add water and stir well. 
  • Reduce heat and simmer for 30 minutes. Add chopped basil before serving, if desired.

Wednesday, January 8, 2020

Snap, Crackle, Pop, it's......

a CV joint....


So, thinking I had some spare time for shop projects, I get to do some 'emergency' maintenance on the truck.  I'd heard some noise, but it was hard to pin down while driving.  I didn't feel like hanging under the truck while someone else drove it to try and pinpoint the sound.  I might be a bit hard of hearing, but I couldn't zero in on the source.....

Until a loud pop/ping sounded on a left turn.  Oh yeah, CV joint.

Might as well do both....
There is a seal inside the bore, drives out towards the engine.  I found them all over, but the quickest was shipped via Autozone.  My 'Zone got it here in 2 days...  I'll tell you about their customer service orientation later, maybe.

I don't have a driver that size, so it's off to the shop to make a 3.8 inch seal driver for the slide hammer...  

Sorry Mr. Pete, the float lock will have to wait.....

Sunday, January 5, 2020

Up Next....

Up Next!

Float Lock Vise


Have you seen this video on YT?  I'm aiming to do it.

My buddy did some work on the blueprints, and I got a set from him.  He also gave me some stock to make the jaws, and I gave him an ACME threaded* rod to make the screw.  Nothing is holding me back, so I plan to give it an hour a day or so.....

Onwards!!

Step 1


*edited to add threaded.  Gravy, who is in charge of the proofreading!?!?

Wednesday, January 1, 2020

Have you ever seen a......

I went to use the four jaw that I got with the Logan lathe, and..... sigh.

It was so dirty, and had chips in the threads.  I couldn't get the jaws to move.  Had to pick out the threads and finally got the jaws out (7mm Allen wrench, 1940's vintage chuck, really?  REALLY?).  I tied the carriers to the jaws, so I didn't lose the mate up.

Yes, really.
Light wear.  Wow!!

It was filthy and a bit rust on the inside.  After disassembly, I soaked it in Zep 505 with boiling water, my goto degreaser...  After a 24 hour soak, a bristle brush and a boiling water rinse, followed by a soak in Evaporust for 12 hours.  Good as new!!

Just a touch of wear
clean

Craftsman 111-21390


post-505 and pre-Evaporust


New product alert.  I'm trying CRC SP-350, a wet lube and antirusting agent.  It is supposed to dry to a film.  Will advise*.  I applied it to the chuck body and back plate. 
Only used once or twice??

Not really chowdered up at all!
The jaws and cheese head screws I soaked in 505, brushed them, and rinsed with hot water again.  Drove off the water with WD-40, and reassembled the chuck.  

It's a beauty.  It is an unused or so lightly used chuck that it looks brand new!!!!


When you get so far ahead of yourself, that you pull the backplate off BEFORE you put in some alignment marks, you can always stick a piece of wire in the mating holes.  Oops.

Jaw 3 has a tight or rough thread, it's a bit hard out near fully opened.  That should work itself out through use.  They don't look damaged.

I didn't expect a "new" chuck for Christmas, but I'm thankful for it just the same.
Quite the surprise!  Happy Christmas!!


*SP-350 dries to a vaseline-like consistency.  I don't know if chips stick to it.  It shows a finger print, but doesn't stick to my finger.  Could be the temp right now.